Mood Boards: The Complete Guide
Building an expressive, well-curated mood board is a key step on the long road to the perfect wardrobe. This post will show you exactly how to create a physical mood board that is more than just a pretty piece of home decor, how to read your mood board like a story and how to turn it into a set of tangible elements that you can incorporate into your wardrobe.
If you have been following INTO MIND for even just a little while, you'll know that I'm all about mood boards. Here's why:
Your own personal style is like a complex piece of art, a mixture of lots of visual elements that, when taken together, form something truly unique. A mood board is literally a blank canvas that you test-drive different combinations of elements on to see how well they work together, without having to buy or commit to anything. Experimenting with single colours, specific items or even abstract visual concepts is as easy as cutting out a few pictures or rearranging them. With a mood board you can shape your style almost like a sculpture, element by element. And: Once it's perfect your mood board is like a mini summary of your ideal style and a reminder of where you and your wardrobe are heading.
If you email me asking for advice on how to define your style, the first thing I’m going to suggest is “build a mood board". And by that I mean a physical, real-life mood board, NOT a Pinterest board. Now, don’t get me wrong: I love Pinterest and think it’s amazing for that initial inspiration search and gathering all of your ideas in one place. But if you are serious about creating a defined personal style and building a matching wardrobe, nothing can replace an actual mood board that you can hang up on your wall, because it requires you to truly engage with your images, arrange them by hand, print them out and decide which to put on the limited space you have available. It’s not a twenty minute job and nor should it be. Building a strong, refined personal style is a long process and not something you want to rush or do in one big sitting. If you want your mood board to do more than just look pretty, your goal should be to turn it into an accurate representation of your ideal style. Think of it as the 'form' aspect of your personal style: a summary of the visual elements of your look, that you can then integrate with functional considerations to build a style concept for your wardrobe or even a signature look.
If you are still in the process of defining your style, I recommend you build a new mood board at least twice a year, to set the mood for your F/W and S/S look. I like to make a whole weekend of it and reserve about an hour or two to gather materials and write down some objectives on Friday evening/afternoon, and one afternoon or morning on Saturday and Sunday to collect inspiration, interpret and arrange it. For this post I've put together a little (ok, a long-ish) 10-step tutorial on how to create your own mood board 2.0 - a mood board that will truly help you pinpoint your aesthetic ideals and build a matching wardrobe - over the course of a weekend. Here's an overview of all 10 steps:
FRIDAY
- Gather materials
- Define objectives
SATURDAY
- Print sources
- Online sources
- Non-fashion items
- Incubation
SUNDAY
- Colours
- Cull
- Organize
- Fill in + tweak
- Finalize mood board
FRIDAY
prep-time

step 1 | GATHER MATERIALS + DEFINE OBJECTIVES
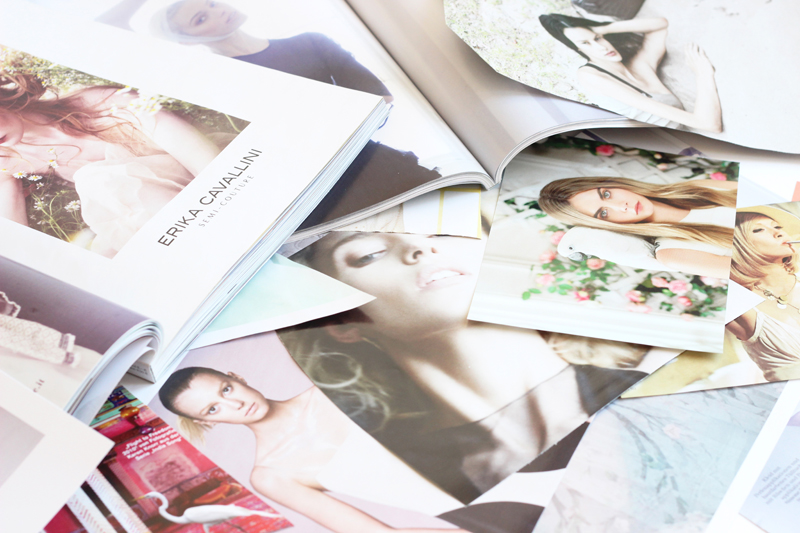
Spend about an hour or so on Friday to gather all of your materials. Your two main stops should be a magazine and an arts & crafts store to pick up any supplies you don't already have at home (see below for a complete list). When shopping for magazines, start with your favourite fashion/beauty ones, but make sure you also branch out to other sections like interior design, art and photography. At home decide where in your house/apartment you want to build your mood board, lay out all of your materials for tomorrow and pre-warn your family/boyfriend/room mate that it will get messy. If you do not have a printer at home, see if you can borrow one for a day or move your Saturday session to a place with free access. Once you have gathered all of your materials, sit down and take a few minutes to write down your objectives for this weekend. The most important thing to consider is the exact context you want to build your mood board for, whether it is your overall style or a more defined context like the upcoming season. Next, set a timer to 5 minutes and, without editing or organizing your thoughts, write down all of your ideas about your style, like specific items, an overall theme or certain colours you want to include. This little exercise primes your brain to turn to creative mode and will help you get into the topic a lot quicker in the morning.
- a stack of magazines
- any books you have at home on topics like photography/fashion/design
- glue or double-sided tape
- scissors or a paper cutter
- a printer (to print, scan and make copies)
- photo printing paper
- a camera (or your phone)
- boxes to store and organise your images
- a big canvas (or masking tape to attach images directly to your wall)
- extras like coloured/patterned paper/fabric
SATURDAY
inspiration x10
step 2 | PRINT SOURCES
Saturday should be all about getting creative and immersing yourself in inspiration. First up: print sources. Gather all of your magazines and books, put one or two cardboard boxes next to you and start cutting out (or making copies of) anything that inspires you in some way in regard to your style and the specific context you chose yesterday. For now, try not to analyze your thoughts too much and just go by how a certain image speaks to you and how it makes you feel (inspired, happy, motivated?). Make sure you don’t only focus on fashion inspiration but also include other types of images, like nature photography, art and design. And: instead of going through your magazines in one go, try to do it in several rounds, each time focusing on something different, e.g. the colours of the images or complete outfits. A random inspiration search is actually a lot harder to pull off than it seems because our brains like to have an aim to focus on and use as a filter. For example, if a great pair of shoes catches your attention in the first couple of pages, your brain is prompted to focus on specific items and you will probably miss inspiring images that don’t include fashion items. To combat this, try to go through your materials focusing on one of these at a time:
SINGLE COLOURS - SINGLE ITEMS - MOODS/OVERALL THEMES - BEAUTY LOOKS - SILHOUETTES OR PROPORTIONS - TEXTURES OR MATERIALS - PATTERNS - COMBINATIONS OF TWO COLOURS - COMBINATIONS OF SPECIFIC ITEMS
step 3 | ONLINE SOURCES
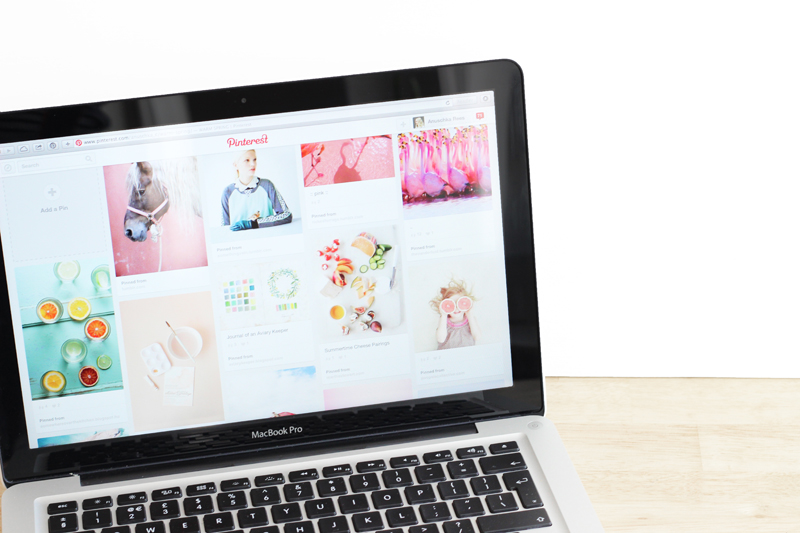
After working through your print sources, have a little coffee break and then focus on the online world of inspiration, i.e. blogs, look books, shops, online magazines and - of course - Pinterest. Write down a quick list of websites you want to visit and then work your way through, using the same focal points as during the last step. Print out anything that inspires you and add it to your box(es). Once you have ticked off every stop on your list, branch out a little. The online world is home to literally every type of visual you could imagine, so get creative and directly search for things you know you like to deepen your focus. For example, if you like the aesthetic of a certain photographer/stylist/illustrator, visit his or her portfolio website and find more examples and different angles of the same style. Or, if you came across some lovely items on Pinterest have a closer look at the online shop of the brand, and so on.
step 4 | NON-FASHION ITEMS
Your personal style, or rather your aesthetic ideals, are not context-specific and, even if you are not aware of it, are probably already pretty prevalent in your own living space. To find them, take your camera or your phone and walk through your apartment/house just like you leafed through the pages of your magazines earlier today and capture everything that speaks to you visually, whether it is a tiny detail, an object or an arrangement of several things. Think everyday objects, pieces of art, posters, decorative elements, a pretty piece of embroidery, the way the sunlight hits the edge of your couch, packaging, jewellery, anything. Make sure you also go through your closet, even if you are not too happy with it at the moment, and take pictures of every item that you love 100%, as well as close-ups of any details, like that gorgeous button on your favourite blouse. If you are feeling particularly ambitious you could even go for a walk and take some pictures outside. After your photo session, pick the best angle of each motif and print everything out.

step 5 | INCUBATION
As the last step today, quickly look through your pile of pictures and check that it includes every item, element or visual theme that you may want to include in your style. If you missed an element that you have been thinking about for weeks, go back online and find an image to represent it. Got everything? Ok, great! Now, the reason why I think you should split up the mood board process is because I believe in the power of incubation. Incubation is a psychological concept that describes how our brain often tends to come up with the most novel ideas on its own, when left to rest after a period of preparation. Your inspiration search today filled your mind with lots of pieces of information to digest and creative ideas to come up with. So, before you wrap up for today, take a few moments to consolidate your experience by writing down some thoughts on how you felt during your inspiration session: which elements stood out to you, which patterns have you spotted already, which things are you unsure about? To give your creative energy some time to recharge and your brain the chance to organize everything you primed it with today, make sure you do something completely different tonight. No more browsing blogs or reading magazines ;)
SUNDAY
definition-phase
step 6 | COLOURS
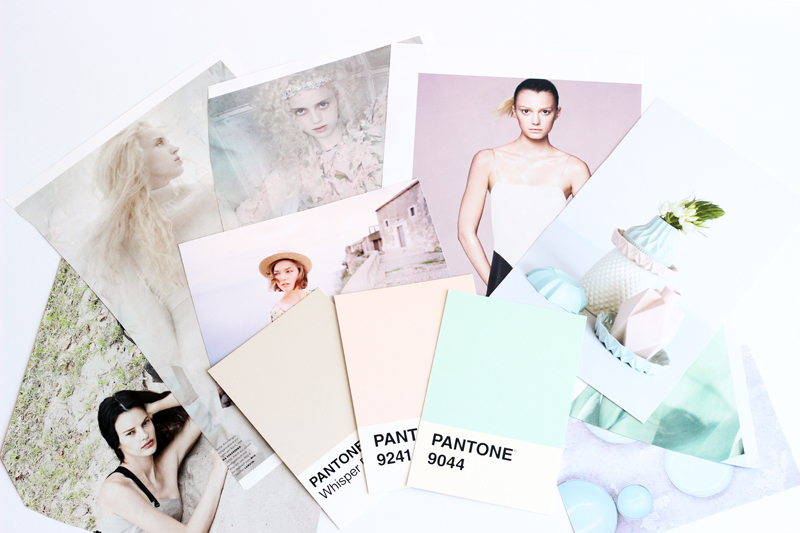
After a busy day of collecting inspiration yesterday, today should be all about taking that inspiration and transforming it into a) a set of tangible elements and b) a mood board that visually represents your ideal style as accurately as possible. As a fist step, open up a new document on your laptop or take a blank piece of paper that you can take notes on throughout each step today. The idea is to, alongside your mood board, also create a list that summarizes the characteristics of your mood board in written form, to make it easier to incorporate these into your wardrobe later on. Now, you will probably be sitting there with a huge pile of images, many more than would fit on your mood board. Before you edit that pile during the next step, make sure you do one thing first: Analyze the colour palette of your un-edited, messy set of pictures. Write down all single shades, colour families (e.g. nudes) and combinations (e.g. gold + forrest green) that occur in at least five different images. The reason why I ask you to do this before you cull pictures is because your 'raw data' will give you a much better idea of the weight each colour should have in your future colour palette. Once you have identified and written down all dominant shades think about the role you would want each of them to play in your wardrobe. Could they work as a main or an accent colour or could you only imagine wearing them as part of your make up? Which shades might work nicely together, perhaps as a colour palette for your wardrobe, and which clash with the overall theme of your set?

step 7 | CULL
Next comes the crucial culling phase. Prepare two boxes: A big “OUT” box, and a “TO KEEP” box. During the inspiration search it’s super important that you don't edit your thoughts to get a clearer idea of your style, but now you need to be ruthless: Any image that you don’t love or that is redundant goes into the ‘OUT” box. You should also be able to tell exactly why you cut or printed out a certain image and it should trigger at least a small happy feeling instantly. If you just feel kinda neutral about something, out it goes. As a second qualifier you also need to make sure your images are all applicable to the context you chose for your mood board. If you want it to represent your Spring/Summer 2014 wardrobe, images of elements that you love but can’t see yourself wearing during the upcoming season should be transferred to the 'TO KEEP' box that you can store for later reference. Once you’ve edited your images, take a quick break to recharge before you continue with step 8.

step 8 | ORGANISE ELEMENTS
At this point you should only be left with images that you truly love and that inspire you in regard to your context. This step and the next one is essentially the nitty-gritty, the parts that most people skip when creating a mood board, but that transform a purely ‘inspirational' set of images into a helpful, visual representation of your ideal style. First, you need to organise your images according to the element that they represent. To do so, refer back to the list of focal points you used during your inspiration search and organise your images into corresponding groups, i.e. place all images that show single items together, same with images of proportions, colours, etc. Next, within those groups, separate your images into specific elements. For example, within your proportions category, group all images that show a combi of a fitted jacket + a maxi dress. If one image represents two or more important elements, either use it for the most dominant one or copy it/print it out again. Now, examine how many different elements you found per focal point. A good aim is 1 to 4 elements for each (except for single items and colours, those can have up to 6). If you have too many elements for a single focal point (e.g. way too many different colours), choose your favourites and get rid of the rest. At the end, write a complete list of all elements. Think of that list as a recipe for your ideal style and use it to tailor your existing wardrobe to your current aesthetic ideals, element by element.

step 9 | FILL IN + TWEAK
As a last step before actually arranging your set of images for the mood board you need to double-check that it accurately represents your ideal style and also gives each element the right amount of emphasis. Grab a few of your magazines again in case you need to replace any images during this step. Then, inspect all of your elements from a bird’s eye view. Are they all nicely complementary or does one stick out and distract from or weaken the overall theme of the set? Is there a way you could tweak that element just a little for more coherence? Look for alternative images and see how well they go with the rest of your elements. If your set looks better and more coherent without an element, remove the corresponding images from your set and your list. Similarly, if you feel like your set is missing something, do some more iterations and add some new images until it looks just right. Once you have selected your final set of elements decide how much weight you want to give each of them. Which elements should play a major role in your wardrobe, which just a supporting role? You can easily express the weight of your elements on your mood board by giving them proportionately more or less space, so make sure you either have a good amount of images for important elements or large ones in comparison to the size of your canvas.

step 10 | FINALIZE MOOD BOARD
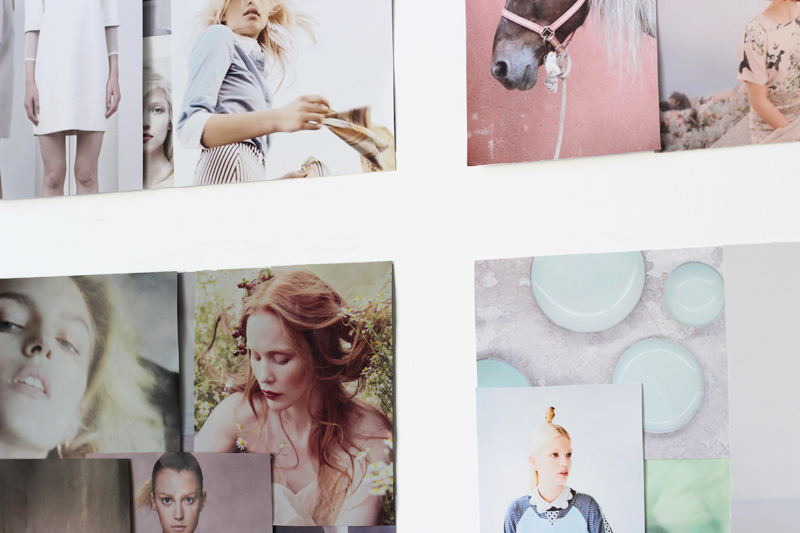
You've done the work, collected a ton of inspiration and selected a set of elements. Now you just need to put together your actual mood board! Spread out all of your final images on a canvas (or a large table if you want to attach your images directly to the wall). Your goal now is to arrange your images in a way that visually expresses the relation between elements and the weight you have assigned them/their prospective function in your wardrobe. One way to do this is to place important elements close to the center and add accent ones around the edges. If your set of images contains a few very distinct groups of elements, you could also express them like I did in this example, as four corners of a quadrant. If you already have more concrete ideas about which roles your elements could play in your wardrobe you could also arrange them accordingly and e.g. group all uniform items, colours and proportions together, etc. Play around with a few different arrangements on the canvas/table before you make your final choice and then start gluing.